
A broken tile in your bathroom, kitchen, or entryway can be an eyesore and possibly even a safety hazard if it has a sharp edge or point. The good news? You don’t have to replace your tile entirely to give it an updated look and enhanced function. At Dream House Home Improvements, we understand the very real frustration of unplanned household maintenance. In this guide, we’ve compiled everything you need to know about seamless tile repair without replacing it, sparing you the frustration, inconvenience, and expense.
Step-by-Step Guide to Fixing a Cracked Tile: All You Need to Know
Regardless of whether your tile is on your wall, floor, or countertops, the repair process remains the same.
Here’s how to refresh your tiles with a step-by-step guide.
Inspect and Clean the Area
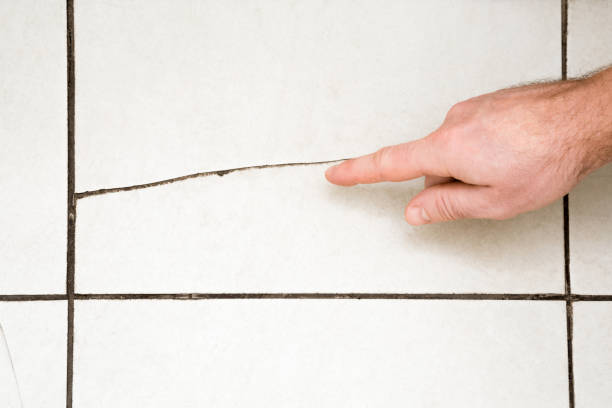
Begin by inspecting the size of the crack. If it’s a single, hairline crack, then you’re in luck: these are usually the easiest to repair. However, if the tile has more than a few cracks or chunks missing, it should be replaced instead.
Next, clean the tile thoroughly. Clean any dirt, but at the same time, include a lot of soapy water and scrub the crack of the tile as well. A soft toothbrush or a can of compressed air can be used to clear fine dust from a cleft. Ensure the tile is completely dry before attempting to repair it.
Select Your Repair Type
A few tile repair methods may be up your alley, depending on the size and area of the crack:
- Epoxy Filler: Best for intended hairline or fine cracks, epoxy is a material that can restore appearance and strength to a crack by filling and sealing it.
- Paint or Nail Polish: Matched paint or nail polish can be used as a quick fix for barely visible and very fine cracks.
- Caulk: Ideal for tiles that are exposed to moisture and movement, such as those on floors or shower walls.
Epoxy filler is the hardest and will be most effective if the crack is a little wider.
Apply the Repair Material
Applying the material method varies depending on the type of material used on the surface.
Here’s how an epoxy filler is applied over the surface.
| Epoxy Filler: Repair Material Application |
| Prepare and mix the epoxy according to the directions on the packaging. |
| Press the epoxy into the crack with a toothpick or craft stick. |
| Smooth it out so when you apply the epoxy, it’s level with the tile. |
| Use a wet cloth to wipe off the remaining glue before it dries. |
Let’s dive into the application method for applying nail polish or paint over the fine cracks in the tiles.
| Paint or Nail Polish: Caulk Filler |
| Coat a layer thinly over the crack. |
| Let each coat dry, applying another coat until the crack is no longer visible. |
| For caulk, apply a small amount to the crack and smooth it with a wet finger or a caulk tool. |
Sanding and Sealing: Wrap it up
Once your filler has dried, usually within 24 hours, sand down the face of the tile carefully with fine sandpaper to feather the repair smooth with the tile face. Lastly, let the clear tile sealer sit on the repaired section for a few minutes. This prevents against future cracking, dirt, and moisture.
Prevent Future Cracks: What You Need to Do
As with treating cracks, preventing them is as crucial as stopping them. Some suggestions to avoid further damage:
| Occasionally, inspect tiles, particularly in high-traffic areas.Seal grout lines annually to prevent water from getting under tiles.Place a leg under heavy furniture for support.Fix leaks promptly: water can damage tile and subfloor if it seeps through.Repeat drain cleaning regularly: just to help prevent water from seeping down and ruining those beautiful tiles. |
By implementing these simple prevention tactics, your tiles can last longer and retain their like-new appearance.
Conclusion
With the above-discussed steps, you can rectify the crack issue in your tiles quickly and efficiently without having to replace them at a high cost. You can try DIY steps to repair the cracks in your tiles, or seek professional assistance for enhanced convenience. Remember, a small crack repair today can avoid costly repairs later!
FAQs
How long does a tile repair last?
A well-executed tile repair can last for years, especially if the area is kept clean and sealed.
Can I step on the repaired tile?
Yes, but wait at least 24 hours after using epoxy or caulk to allow it to cure completely or harden before walking on it and placing heavy objects on the tile.
What happens if the crack just keeps growing?
It may be an indication of movement under the tile or water damage. Inspect the carpet pad and call a professional if the issue persists.
Can you mend cracked floor tiles in the same way as wall tiles?
Yes, we cover similar repair methods, but do make sure to use a heavy-duty filler and sealer for floor tiles since they get more pressure and movement than wall tiles.
Should you hire a professional for tile repair?
The process Level the windscreen. For larger cracks, intricate designs, or if you’re not confident about your DIY skills, consider hiring a professional for a seamless and durable fix.